100% Free

SMSGate Setup Guide

Send unlimited SMS appointment reminders to your clients — for free — using your own Android phone as the SMS gateway. No third-party fees, no monthly SMS costs.

Open Calendo

What is SMSGate?

SMSGate (also known as SMS Gateway for Android™) is a free, open-source app that turns any Android phone into a personal SMS gateway. Once installed on a phone that stays connected to the internet, Calendo can ask it to send SMS messages on your behalf — using your own phone number.

This means you pay nothing extra for SMS reminders. The messages are sent through your normal mobile plan, just as if you typed them yourself.

Tip: A cheap spare Android phone or an always-on work phone works perfectly. The phone just needs a SIM card and an internet connection (Wi-Fi is fine).
1

Install the SMSGate app

The SMSGate app is not on the Google Play Store. You install it directly from the official documentation page at docs.sms-gate.app.

Prerequisites

Installation steps

  1. On your Android device, open the browser and go to docs.sms-gate.app/installation/.
  2. Follow the Installing from APK section on that page to download the latest APK release directly from the official GitHub releases page.
  3. Before you can install it, you need to allow your device to install apps from unknown sources: go to Settings → Security (or Privacy on newer devices) and enable Install unknown apps (or Unknown sources).
  4. Open the downloaded APK with your file manager and follow the on-screen prompts to install.
  5. When the app opens for the first time, grant the requested permissions:
    • Send SMS — required to send messages.
    • Read Phone State — needed for SIM card selection if you have dual SIM.
Android 15+ users: If Google Play Protect blocks the installation, temporarily disable it: open Google Play Store → Profile → Play Protect → Settings and turn off Scan apps with Play Protect. Re-enable it immediately after the installation is complete.
Which build to choose? Download the standard (secure) build — it's the recommended option for all Calendo users and enforces HTTPS for all communication.
2

Configure the main screen

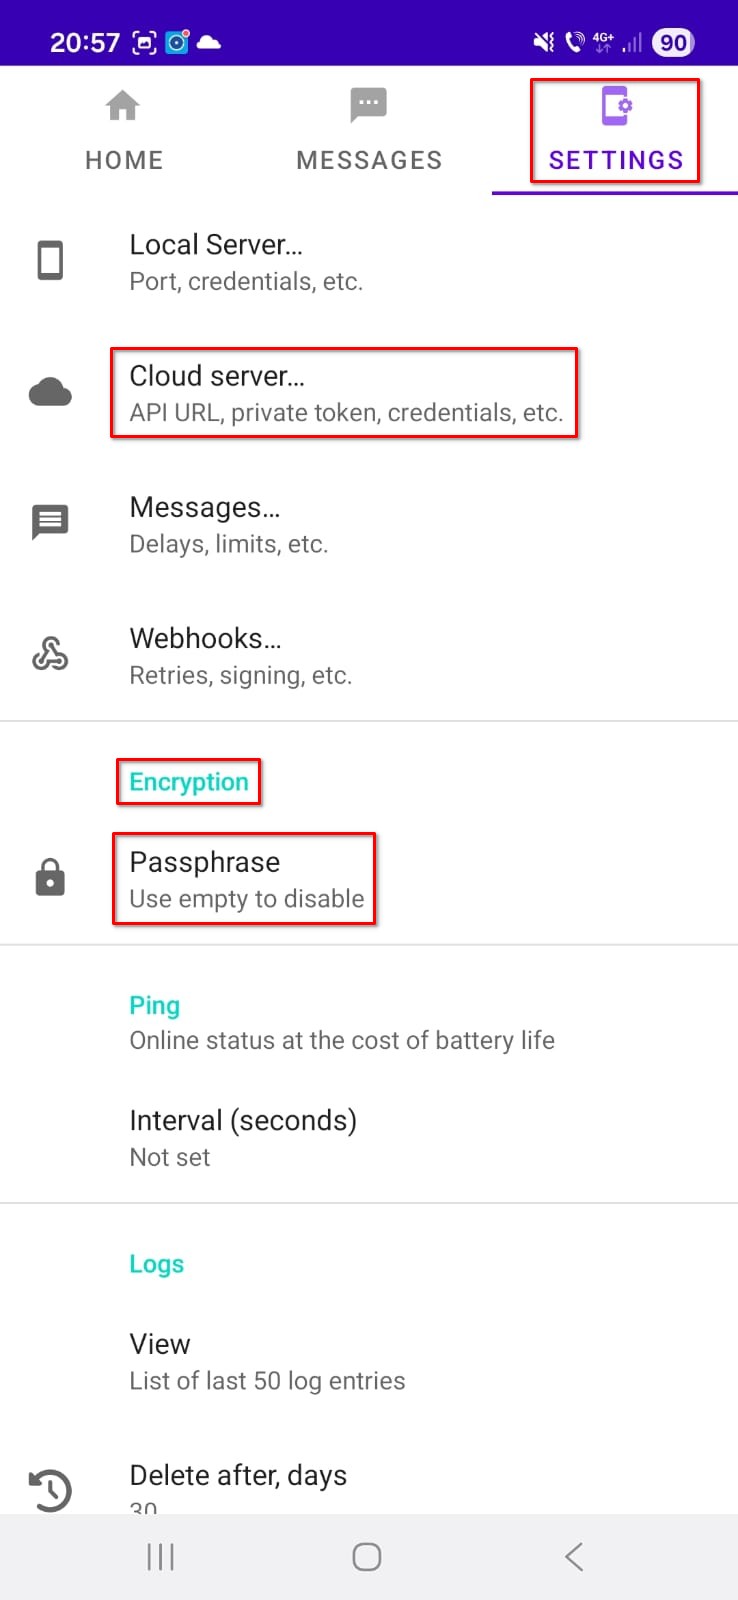
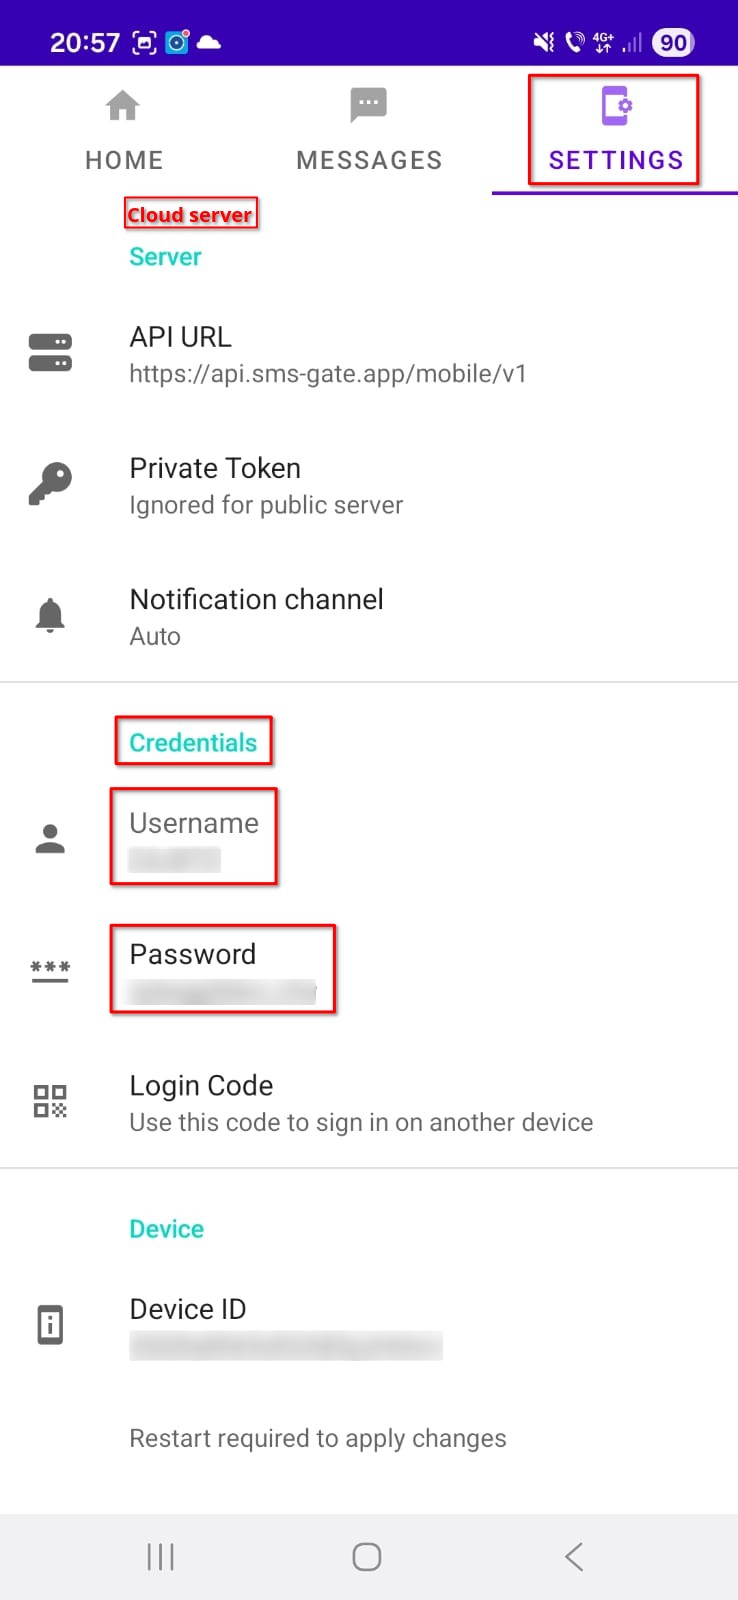
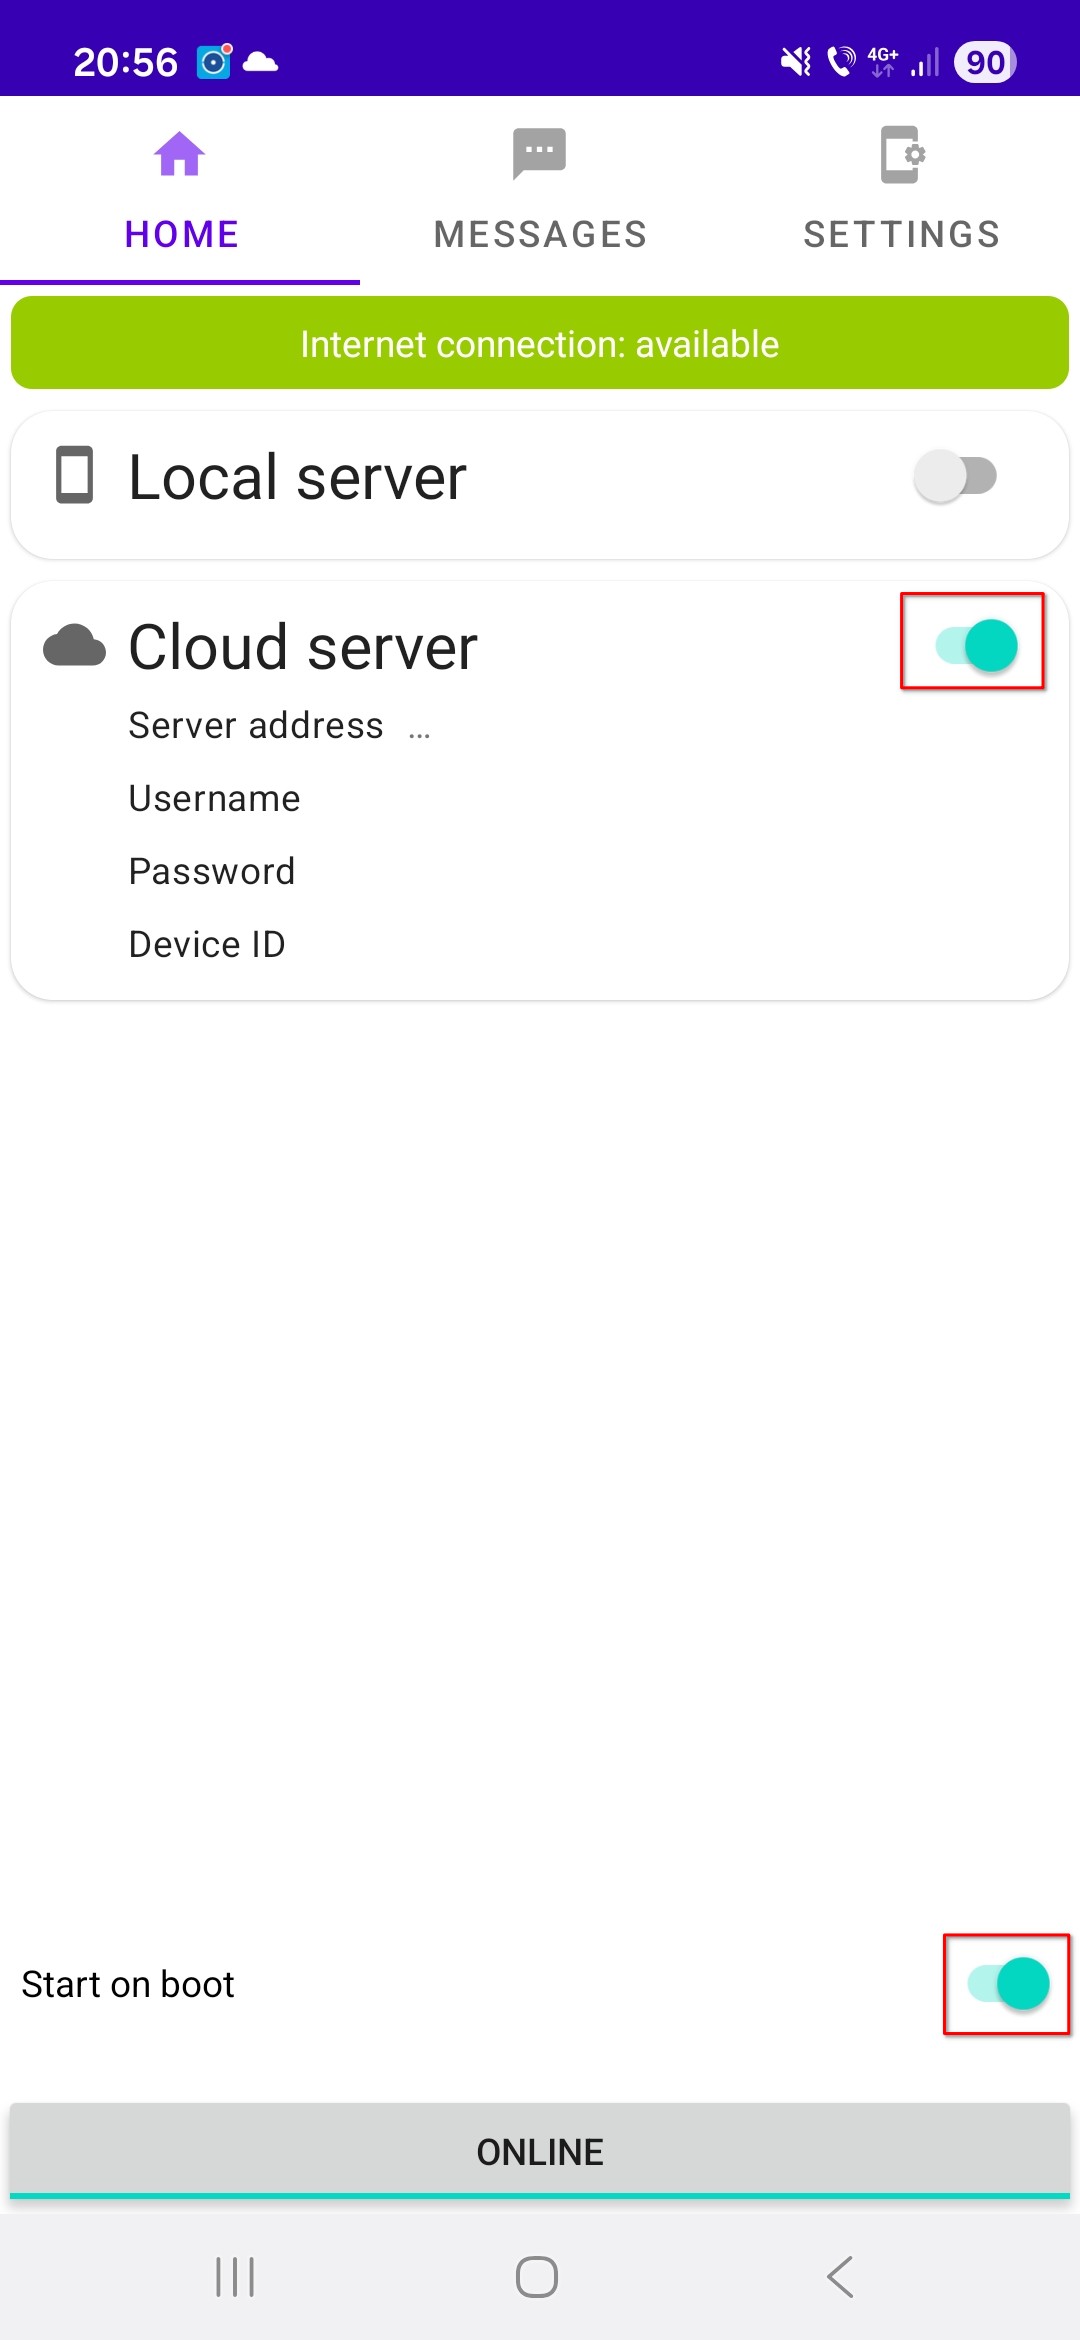
After opening SMSGate for the first time you will see the main screen. There are two important toggles you need to turn on here:

SMSGate main screen showing Cloud server and Start on boot toggles
SMSGate main screen — enable "Cloud server" and "Start on boot"
Tip: Keep the SMSGate app running in the background. Avoid force-stopping it or putting it in battery saver mode — otherwise your phone may miss the request from Calendo.
3

Open Settings & find your credentials

Tap the Settings (gear) icon in SMSGate to open the settings screen. Here you will find two important sections:

SMSGate settings screen showing Cloud server and Encryption sections
SMSGate settings — tap "Cloud server" to access your credentials
4

Enter credentials in Calendo

Inside Settings → Cloud server in SMSGate you will see your Username and Password. These are your unique credentials that allow Calendo to authenticate with your phone.

SMSGate cloud server credentials screen
SMSGate cloud server credentials — copy the Username and Password

Now, in Calendo:

  1. Go to Admin → Business Settings → Notifications and scroll down to the SMSGate configuration section.
  2. Tap Set SMSGate credentials.
  3. Paste the Username and Password from the SMSGate app into the corresponding fields.
  4. Save your settings.
Success indicator: Once the credentials are saved and the phone is online, the status in Calendo will change to "SMSGate ready".
5

Set up an encryption passphrase (recommended)

SMSGate supports end-to-end encryption for the message content traveling between Calendo's servers and your phone. When enabled, the message text is encrypted before leaving Calendo and decrypted only on your device — SMSGate's cloud relay cannot read it.

To enable encryption:

  1. In SMSGate, go to Settings → Encryption.
  2. Enter a passphrase of your choice and save.
  3. In Calendo, go to Admin → Business Settings → Notifications → SMSGate configuration and enter the same passphrase in the Encryption key field.
Important: The passphrase in Calendo must exactly match the passphrase in SMSGate. If they differ, messages will fail to decrypt and will not be sent.
6

Verify the connection

After completing the setup, check the status in Calendo's notification settings:

Keep your phone online: SMSGate only works when your Android device is powered on and connected to the internet. A phone that is off or has no data/Wi-Fi will show as offline.

Tips & Troubleshooting

Battery optimization

Android's battery optimization can kill background apps. To prevent SMSGate from being stopped, go to Settings → Battery → Battery optimization, find SMSGate in the list, and set it to Not optimized (or Unrestricted on some devices).

Dual SIM phones

If your phone has two SIM cards, you can choose which one SMSGate uses for sending messages. In SMSGate's Settings, look for the SIM card option and select the preferred SIM.

Credentials changed?

SMSGate generates your Username and Password automatically and they don't change unless you reinstall the app. If you reinstall SMSGate, generate fresh credentials and update them in Calendo.

Messages not being sent?

For advanced configuration options and the full official documentation, visit docs.sms-gate.app.

Ready to send SMS reminders?

Log in to Calendo and go to Business Settings → Notifications to complete the SMSGate setup.

Open Calendo